[2008-05-05] Improvised radial alembic for DIY steam distillation

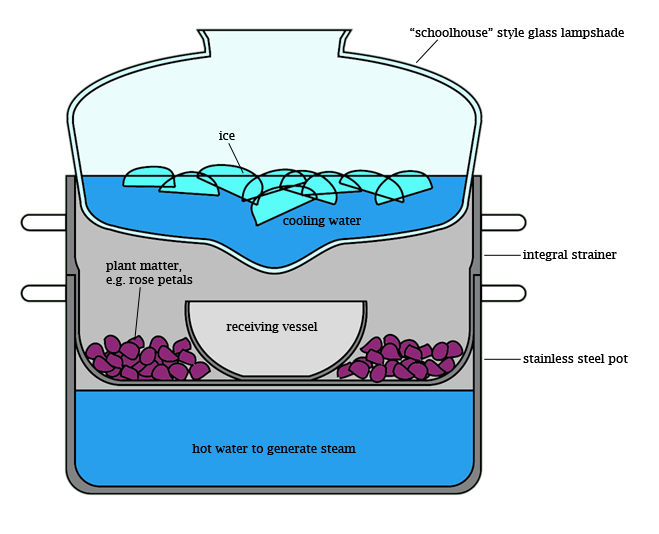
This is a cool trick for improvising a condenser when you don't have access to proper equipment. It could be used for simple distillation (say, to purify water), or, in the slightly more elaborate set-up pictured here, steam distillation (say, to extract essential oils from plants). I would add that this is not my idea, originally, although I may have been the first to recognize the unique shape of the so-called "schoolhouse" lamp globe as highly amenable for impromptu condenser service, since it comes with a readymade "drip tip" where condensate can accumulate. My version, shown in the diagram, requires a stainless steel pot with an integral strainer (constructed such that there is some distance between the pot bottom and the strainer bottom when the strainer is in place), a "schoolhouse" style glass lamp globe which is of greater diameter than the pot, and a stainless steel or glass receiving vessel. Consumables are water, ice, and plant material to be extracted.
To use, assemble the apparatus, entirely, from the bottom up, before applying heat. First, set the pot on the heat source and fill with purified water to a level just below the strainer bottom when it is in place. Then insert the strainer, and fill it with the material to be extracted, for instance rose petals or rosemary sprigs. Then clear a space in the center of the strainer to set the receiving vessel. Next, position the glass lamp shade on top of the pot as shown, checking that the "drip tip" is centered over the receiving vessel. Then fill the condenser with as much ice as it can hold. It is not necessary to add water to the condenser, as the ice will melt during the distillation to make ice water at 0C. Finally, turn on the heat and establish a slow simmer. It is necessary to lift the condenser every so often to check on the progress of the distillation; this is fine, just try to minimize the amount of time the condenser is removed, and watch out for steam burns when you remove it.
The idea is gently to boil the water in the bottom of the pot, producing steam which passes through your organic material, where it collects volatile compounds before rising to the top of the pot. There, it encounters the cold outer surface of the glass lampshade and recondenses with its extracted volatiles. Condensate flows down the surface of the lampshade and accumulates at its lowest point, from which it drips into the receiving flask. Depending on the material you extract and the particular extraction conditions, the contents of the receiving flask may form a cloudy emulsion or separate oil-and-water layers. The latter is preferable, of course, as it allows much easier separation of extracted products from distillate water.
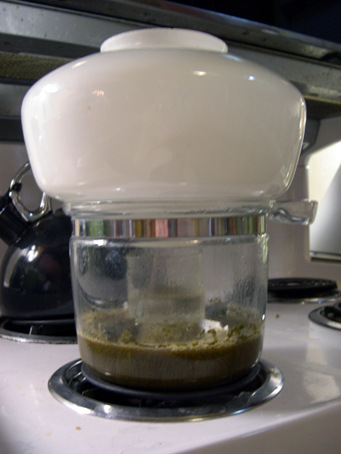
I have performed a couple of these home steam distillations using the similar improvised apparatus shown in the photos below. I chose to use a clear Pyrex "Flameware" saucepan instead of a stainless steel pot because I wanted to be able to watch and photograph the distillation process without removing the condenser. This visibility is not essential, and greater capacity can be achieved with the stainless-steel pot setup outlined above simply because of the ready availability of much larger vessels in stainless steel than in Pyrex. These "Flameware" pots are not manufactured anymore; I bought a used one from eBay especially for this purpose. Because no integral strainer was available for the glass pot, I chose a slightly different arrangement using a homemade aluminum stand that sits down in the bottom of the pot and keeps the receiving vessel centered above the level of the boiling water. This system requires that the organic material be mixed in with the boiling water, which may or may not work as well as an apparatus that exposes the organic material to steam only. Finally, because I could find no handy glass receiving vessel which was both narrow and short enough to fit the pot and stand I had assembled, I was forced to cut one from a beer bottle using conventional bottle-cutting techniques.

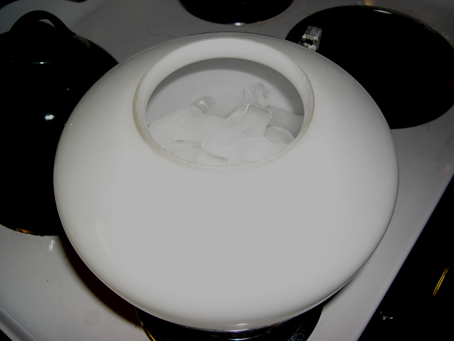
These photos were taken during an extraction of rosemary sprigs. The rosemary in question was cut from a large bush growing in my parents' flowerbed in south Austin. The green "leaves" were manually stripped from the cut rosemary sprigs while wearing gloves, and collected in the bowl of a food processor. Aboue 1L of green material was thus collected, which was reduced to about 500 mL after pulverizing as finely as possible in the food processor. The resulting damp green powder was transferred to the Pyrex saucepan positioned on my kitchen stove, and the receiving vessel stand nestled into it until the stand was resting firmly on the bottom of the pot. Bought distilled water was added to a level just below the top of the receiving vessel stand, and the receiving vessel put in place. Lastly, the glass lamp shade was set into the open mouth of the saucepan and filled with ice. Maximum heat was applied from the stove to bring the stillpot mixture to a boil, which was then reduced to maintain a slow simmer.

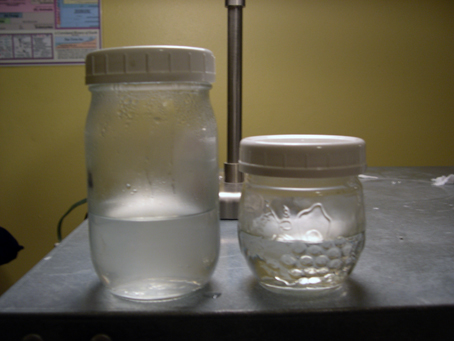
The distillation was run long enough to fill the receiving flask three times. The first two of these fractions showed significant cloudiness indicating the presence of volatile organic compounds in emulsion. The third was clear, indicating that the material had been more-or-less exhausted. The resulting rosemary essence smelled so strongly that it was almost unpleasant. Just a drop or two is all that is necessary to scent towels, laundry, soap, etc. Using the same apparatus, I have performed similar steam extractions of orange peel and rose petals. Neither were as effective as rosemary, at least as measured by the strength of the scent of the resulting distillate. The rose petals in question, however, were storebought and not very fragrant to begin with; I've heard that commercial lines are commonly bred to reduce fragrance because this also prolongs shelf life. I suspect wild-type, highly fragrant rose petals would produce a useful and strong-smelling distillate.

last modified 2008-05-05